In this Davinci Resolve 16 fusion tutorial, you will learn about the Fusion 3d Basics.
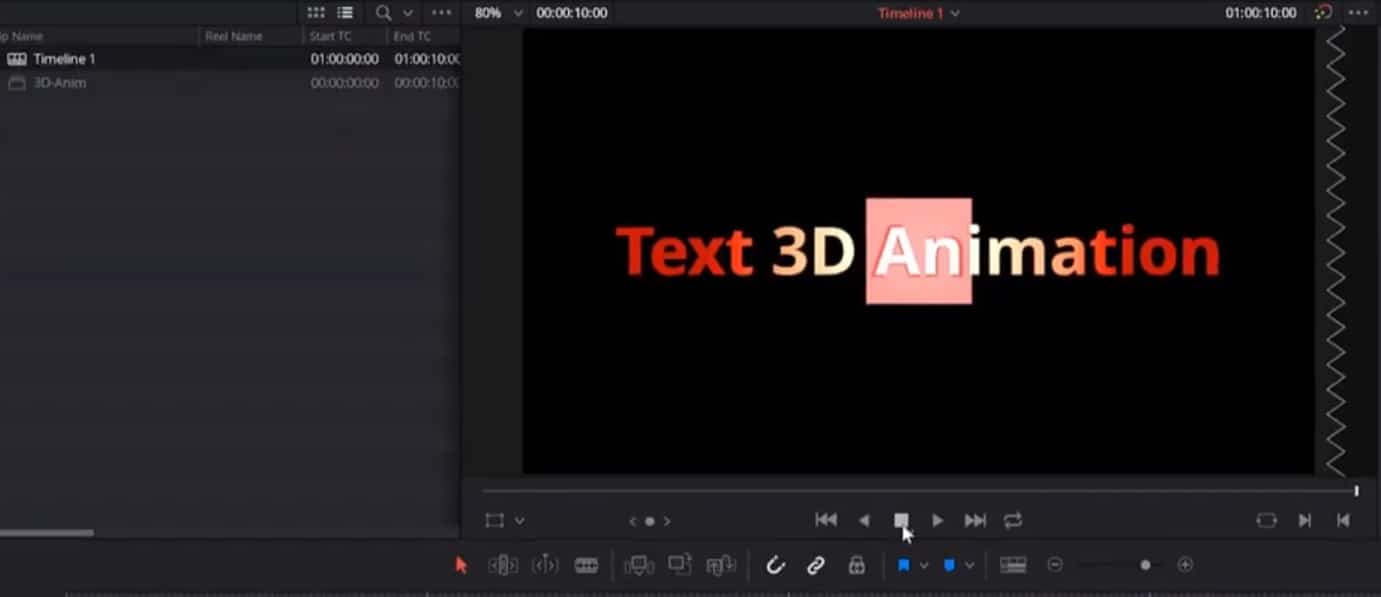
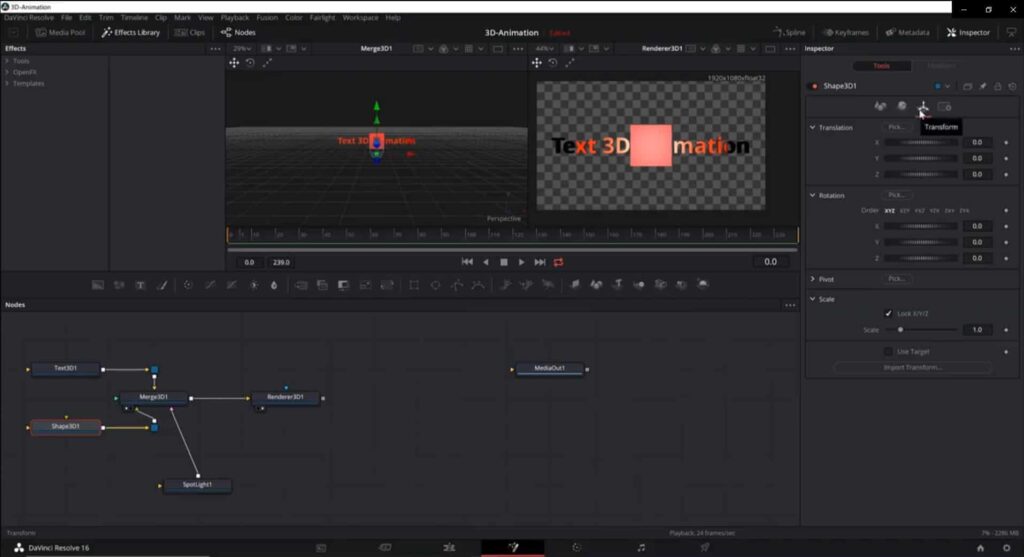
We start the tutorial by adding a Text3D node, then we add a Shape3D node and merge them together.
To complete the 3D scene, we always, must add a Renderer3D node.
To enrich the scene with more element, we will add lights as well.
First, we adjust the Renderer settings and enable the “Lighting” and “Shadows”.
Note: in this tutorial we use the “Software Renderer”.
Here you will learn to use the “SpotLight” in DaVinci Resolve. I will show you the main settings of a “SpotLight”.
You will also learn to create a 3D text, by adding and editing the extrusion settings.
Also, a Camera3D node is added to the scene, to simulate a real world camera.
To get a more realistic lighting effect, we also apply an “AmbientLight” node to the 3D scene.
To make the scene more dynamic, I will show you how to animate the Camera. The camera moves forward and backwards in the 3d Space.
Next, you will see how to animate the 3D text. We will rotate the 3D Text around its X axis.
We also keyframe and animate the Shape or the Cube node around its Y axis.
The final animation shows the camera moving slowly backwards, while the text and the cube rotate.
This is a pretty basic 3D tutorial in fusion tab of DaVinci Resolve, but allows you to start learning 3D in Resolve.
Things to remember: to create a 3d scene in DaVinci Resolve, the Merge3D and the Renderer3D node are required.
Optionally, you can add shapes, 3d Text, camera3D, spotlight, ambient light and different other nodes that are applicable in a 3D scene.
You are most likely here if you searched for a Davinci Resolve 16 fusion tutorial or a Fusion Tutorial in DaVinci Resolve 16.
Leave your questions or comments in the comment section below.
Thanks for watching and reading.
![]()