Table of Contents
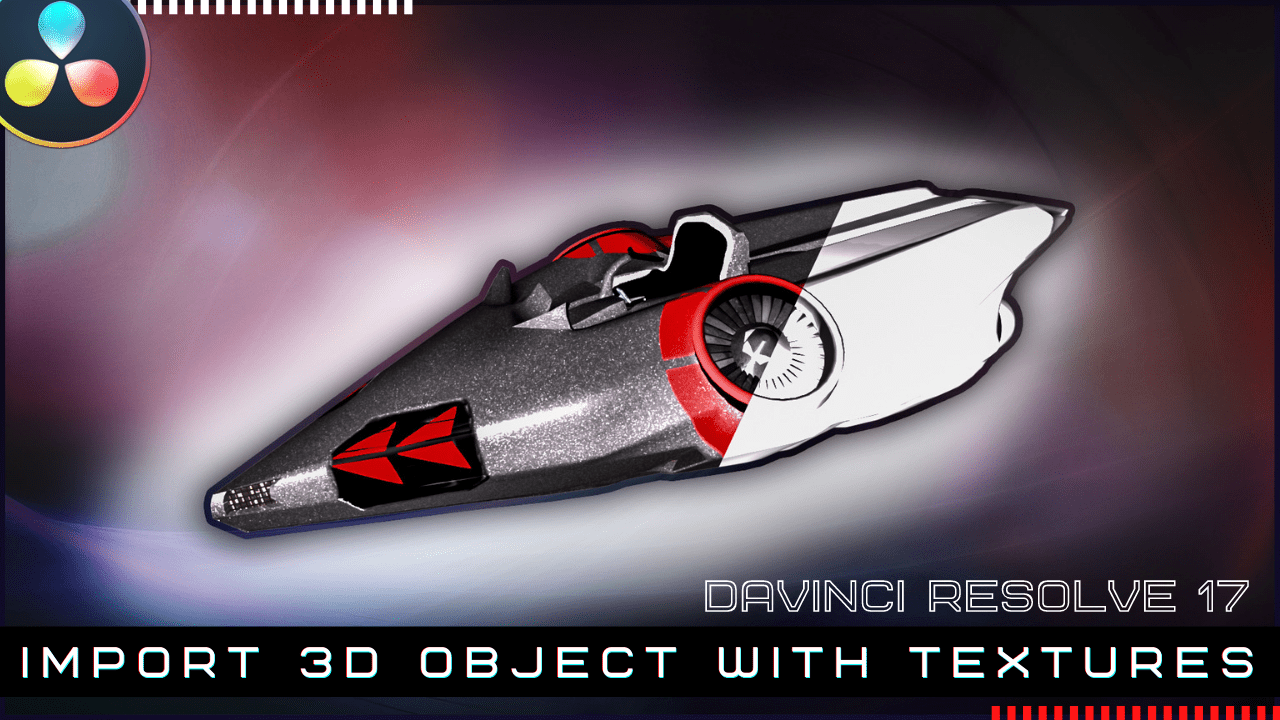
In this tutorial I will show you how to import a complex 3D object with textures in DaVinci Resolve 17.
We will texture the object with image textures.
To be able to import a 3D object, of course, you need to have a 3D model made in any of the 3D modeling applications like: Blender, 3Ds Max, Maya.
DaVinci Resolve is limited, when it comes to 3D modeling, as there are not many tools that allow you to make complex 3D models.
Where to get a free 3D model?
Well, there are many websites that offer free 3D model.
I was looking for a more complex model that would be compatible with this tutorial. I was also looking to find a low-poly model.
A low poly model as a low number of polygons and it doesn’t overwhelm your machine. It is mostly used in gaming design and places where performance is very important!
The perfect model for this tutorial can be found here: https://3dexport.com/free-3dmodel-futuristic-cycles-low-poly-subdivision-ready-317441.htm
It is available in many 3D formats like: blend, fbx, obj.
Most importantly, it has excellent quality textures, available in png image format.
The textures have the alpha channel included, which is also very important and make their usage a lot easier in DaVinci Resolve.
Import the 3D model in DaVinci Resolve 17
We can import any 3D mesh or model from the Fusion page of DaVinci Resolve 17.
We use the Fusion -> Import -> FBX Scene … feature.
After importing it, you will see the whole structure of the 3D model.
A good thing about this model is that it is well structured and divided.
You will just need to go quickly through each part to learn more about it.
The model is divided in many parts, represented in form of nodes in Resolve 17.
Some of the parts are:
- pedals (2)
- steering wheel
- chassis
- headlights (2)
- fans (2)
- main engine
- engine and fan outer shells
Texturing the 3D Model
DaVinci Resolve 17 is limited when it comes to presenting each texture model, that is why in this tutorial we use only a limited set of textures.
There are four shaders we can use in DaVinci Resolve 17:
- blinn
- wand
- cook-torrance
- phong
For this tutorial we will use the cook-torrance shader node, as it allows us to utilize the roughness map.
For this tutorial the textures like so:
- base color map to diffuse color input of cook-torrance
- metallic map to specular intensity input
- roughness map to roughness input
- normal map to bump map input
Connect all these texture maps to each and any element of the 3D model and you will get the final well textured 3D model of the flying machine used in this tutorial.
Final Notes
DaVinci Resolve 17 might not be used for complex 3D object, but it has a powerful engine that can be used very well in producing vfx or 3D environment for your next video editing project.
Leave your questions in the comment section below!
Thanks for reading the article and watching the video!
![]()