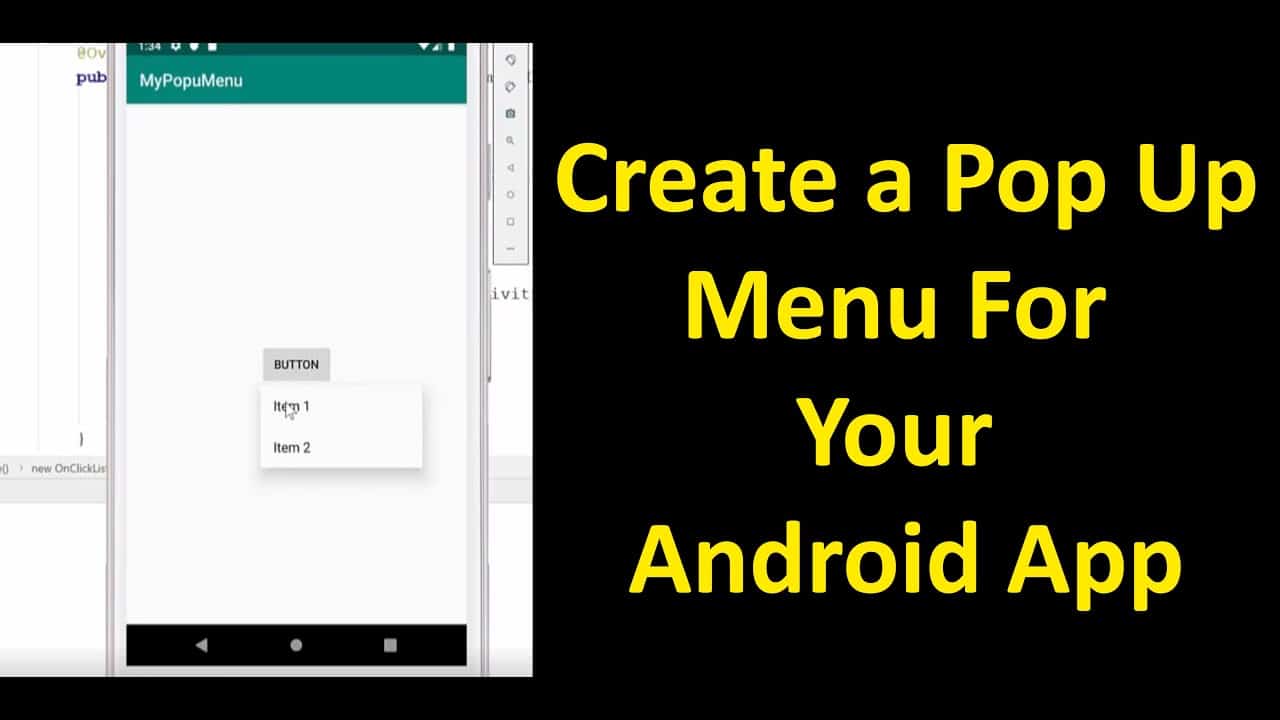
In this tutorial I will show you how to create a pop up menu for your Android App.
We start by creating a new project in Android Studio. Make sure to choose Java for the programming language. The minimum API level will be API 15: Android 4.0.3 (IceCreamSandwich).
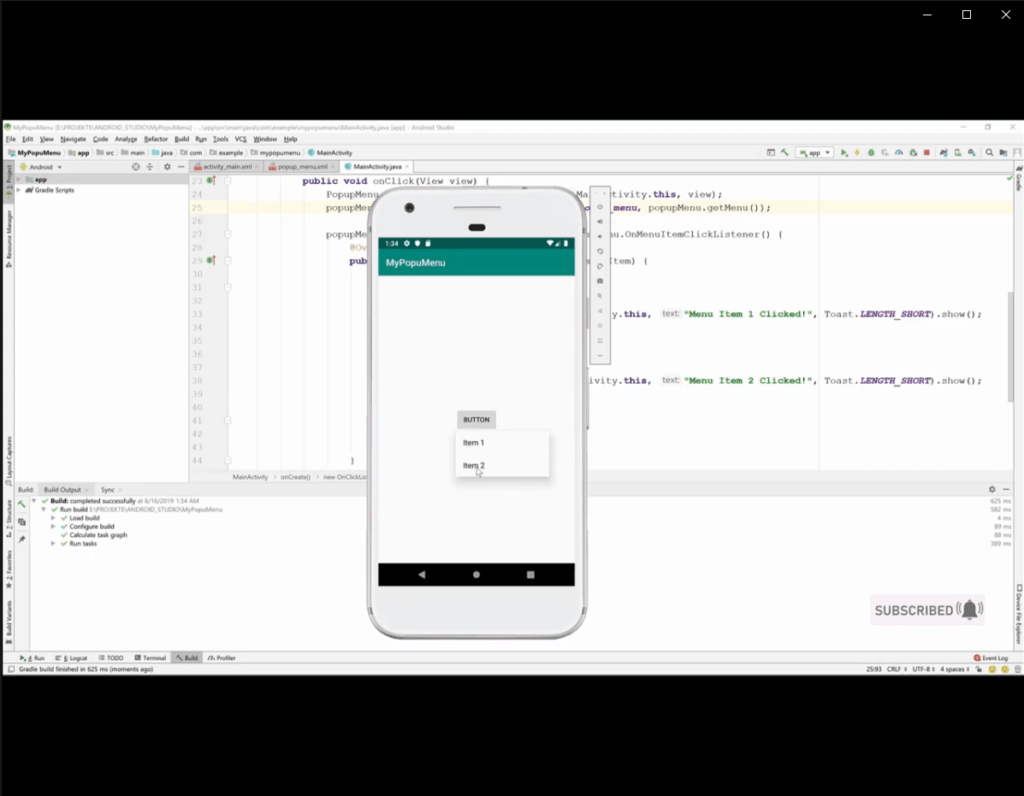
Next, we add a button to the middle of the app screen. We align it to the center by dragging the edges of the button to each of the four screen side (top, bottom, left and right). We use the Constraint Layout as the app layout.
Creating the Menu
We need to create a menu directory from the ‘New Resource Directory‘ dialog box:
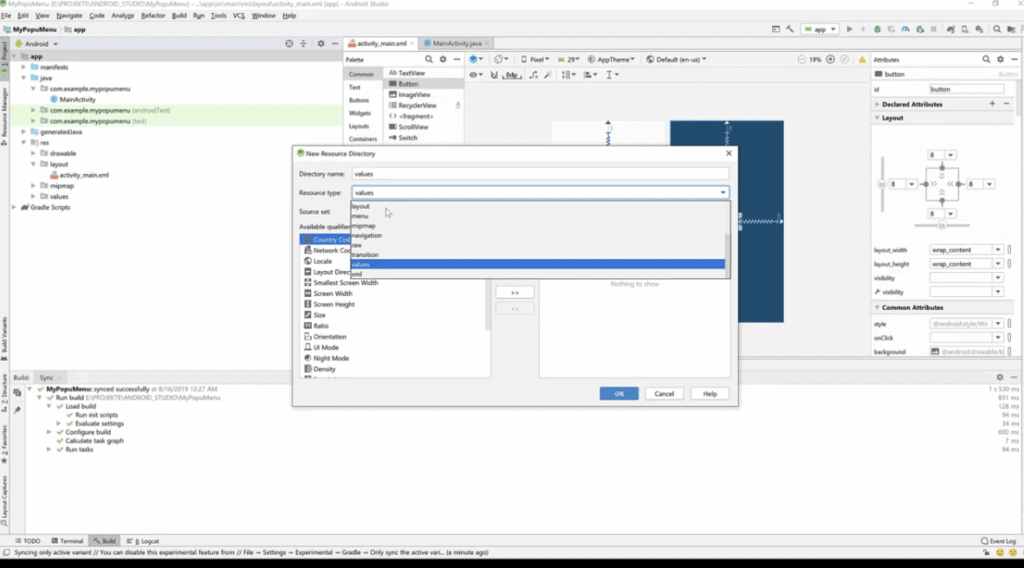
Then, we create a new menu resource file and name it popup_menu.xml.
In the ‘Text‘ tab of Android Studio, we edit the menu xml file and add two menu items.
We name the menu items to:
- Item 1
- Item 2
Note: I add two menu items, but you can add as many as you like.
Java Code
We first reference the button in the main screen using the following code:
Button btn = findViewById(R.id.button)
In the ‘R.id.button‘ part, ‘button’ is the id of the button we added to the screen in the beginning of this tutorial.
Make sure to import the android.widget.Button library using the Alt+Enter shortcut, otherwise your app won’t work!
Next, we define the button’s onClickListener code or event.
btn.setOnClickListener(new View.OnClickListener(){
   @Override
   public void onClick(View view){
   PopupMenu popupMenu = new PopupMenu(context: MainActivity.this, view);
   popupMenu.getMenuInflater().inflate(R.menu.popup_menu, popupMenu.getMenu());

   popupMenu.setOnMenuItemClickListener(new PopupMenu.OnMenuItemClickListener() {
       @Override
       public boolean onMenuItemClick(MenuItem menuItem) {

           switch(menuItem.getItemId()){
                  case R.id.menu_item_1:
                       Toast.makeText(context:  MainActivity.this, text: "Menu Item 1 Clicked!", Toast.LENGTH_SHORT).show();
                       break;

                  case R.id.menu_item_1:
                       Toast.makeText(context: MainActivity.this, text: "Menu Item 2 Clicked!", Toast.LENGTH_SHORT).show();
                       break;
}
           return false;
}
});
   popupMenu.show();
}
});
To break the code, first we define a PopupMenu variable, which takes the MainActivity as the context parameter and the button view as the second parameter. Then, we create the popup menu by inflating the ‘popup_menu.xml‘ file, using the ‘getMenuInflate‘ method.
PopupMenu popupMenu = new PopupMenu(context: MainActivity.this, view);
popupMenu.getMenuInflater().inflate(R.menu.popup_menu, popupMenu.getMenu());
Next, we define the ‘OnMenuItemClickListener‘ for the popup menu. The ‘onMenuItemClick’ function, takes the ‘menuItem‘ as the parameter and passes it to the switch block.
In the switch block, we check the id of the item clicked. If it is ‘Item 1‘, then we show a “Menu Item 1 Clicked!” as a toast message.
If it is ‘Item 2‘, then we show a “Menu Item 2 Clicked!” as a toast message.
popupMenu.setOnMenuItemClickListener(new PopupMenu.OnMenuItemClickListener()
{ @Override
public boolean onMenuItemClick(MenuItem menuItem)
{
switch(menuItem.getItemId()){
   case R.id.menu_item_1:
     Toast.makeText(context: MainActivity.this, text: "Menu Item 1 Clicked!", Toast.LENGTH_SHORT).show();
     break;

   case R.id.menu_item_1:
     Toast.makeText(context: MainActivity.this, text: "Menu Item 2 Clicked!", Toast.LENGTH_SHORT).show();
     break;
}
Within the switch block you define the action that will be taken after clicking each of the items in the popup menu.
Based on the number of the items in the popup menu, you will have as much as case block defined in the switch code area.
Hopefully this was helpful.
Make sure to check the video in the beginning of this article to have a visual representation of the tutorial.
Thanks for watching and reading!
![]()