This tutorial will show you how to reduce and compress image size in Android App, using Android Studio utilities.
File size reduction is very important to reduce the overall size of an Android App.
With the small size app, it ensures that it is downloaded much quicker and loads faster, while requiring less resources.
Decreasing Image Size
In a new Android Studio, in a new Android Java Project, we drag an Image View control to the canvas. For testing purposes, you can select an Android Studio Avatar.
Note: the Avatars are used just for testing and are not visible when you run your Andorid App.
Make sure you center and change the image size accordingly.
The image you want to use, you need to copy and paste it to the ‘drawable’ folder in the ‘res’ folder in your Android Project.
In the .xml file of the Andorid app, we change the ‘srcCompat’ attribute source, to point to our image using the ‘@drawable’ command.
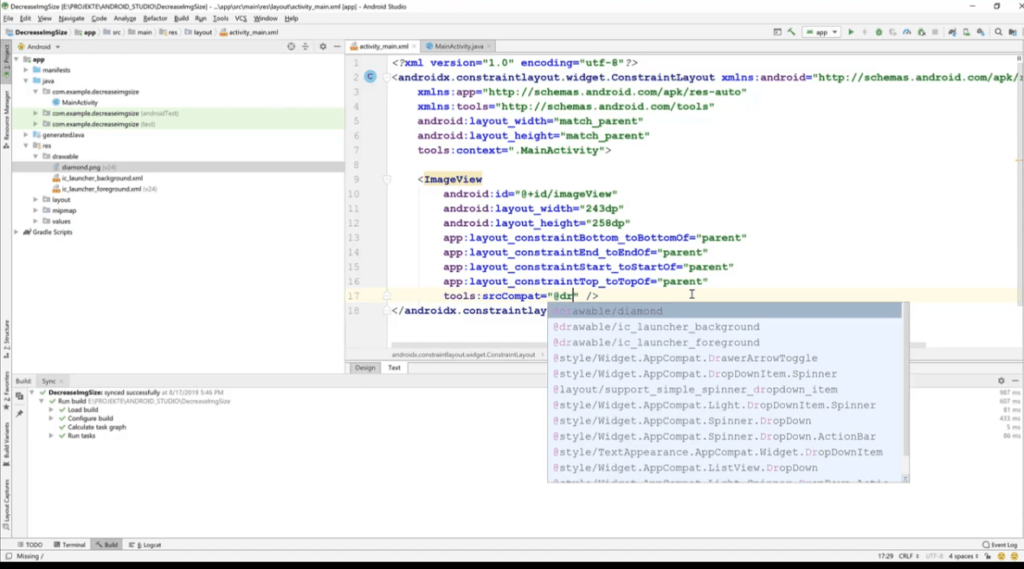
If everything is done correctly, the image must appear on the screen.
To start decreasing the image size, you need to go to the ‘drawable’ folder, find the image you want to reduce or compress the size of. Right click and select the ‘Convert to WebP…’ option.
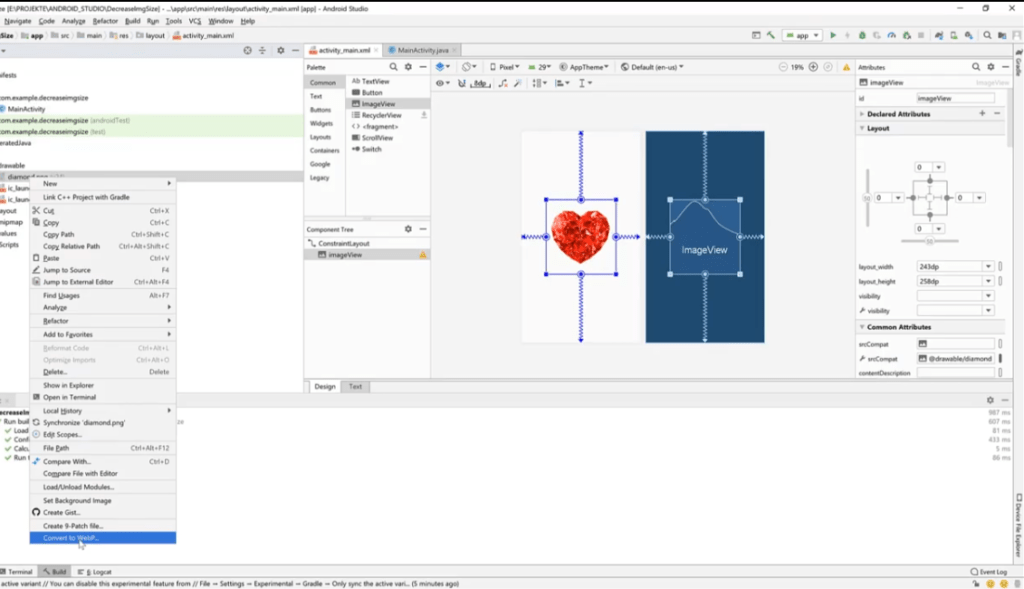
After you select that option, an ‘Converting Image to WebP’ dialog window appears.
Note: if you need to use images with transparency or the alpha channel in Android Studio, you must make sure to work on minimum API 18 SDK, as the transperency requires minimum Android 4.3 (API 18)
Quickly, to change the ‘minSdk’ Version of an Android App, you need to go to the Gradle scripts and find the file ‘build.gradle’ and change the number in the line ‘minSdkVersion’ to your desired number.
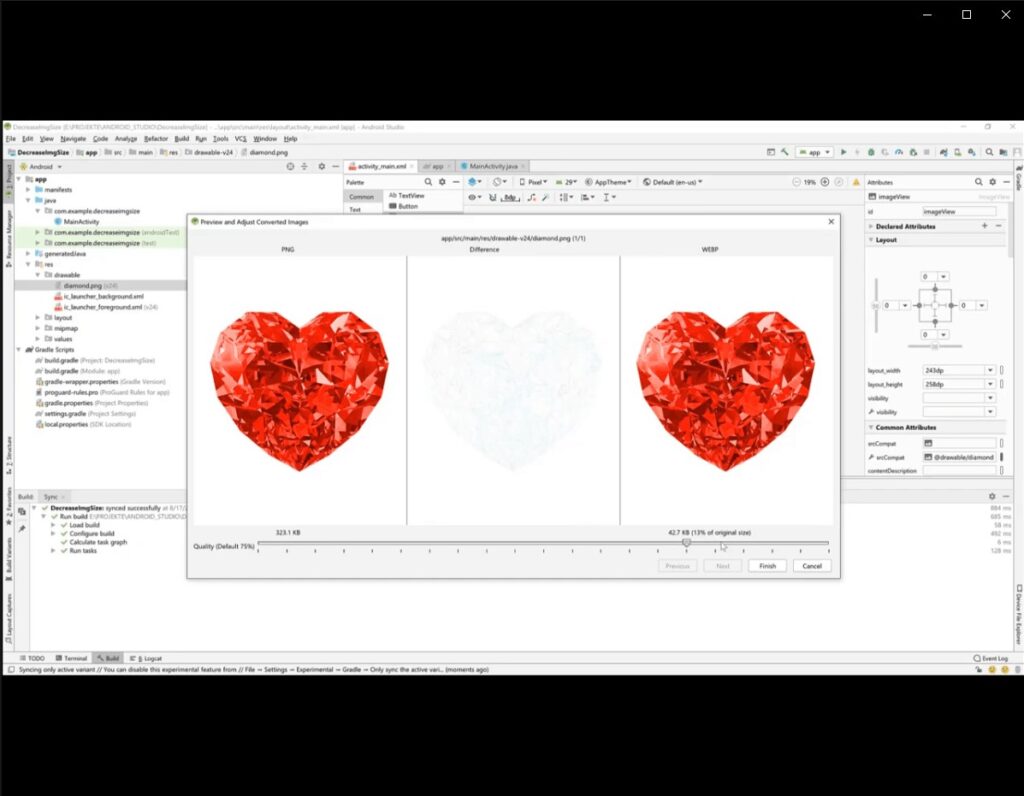
Preview and Adjust Converted Images
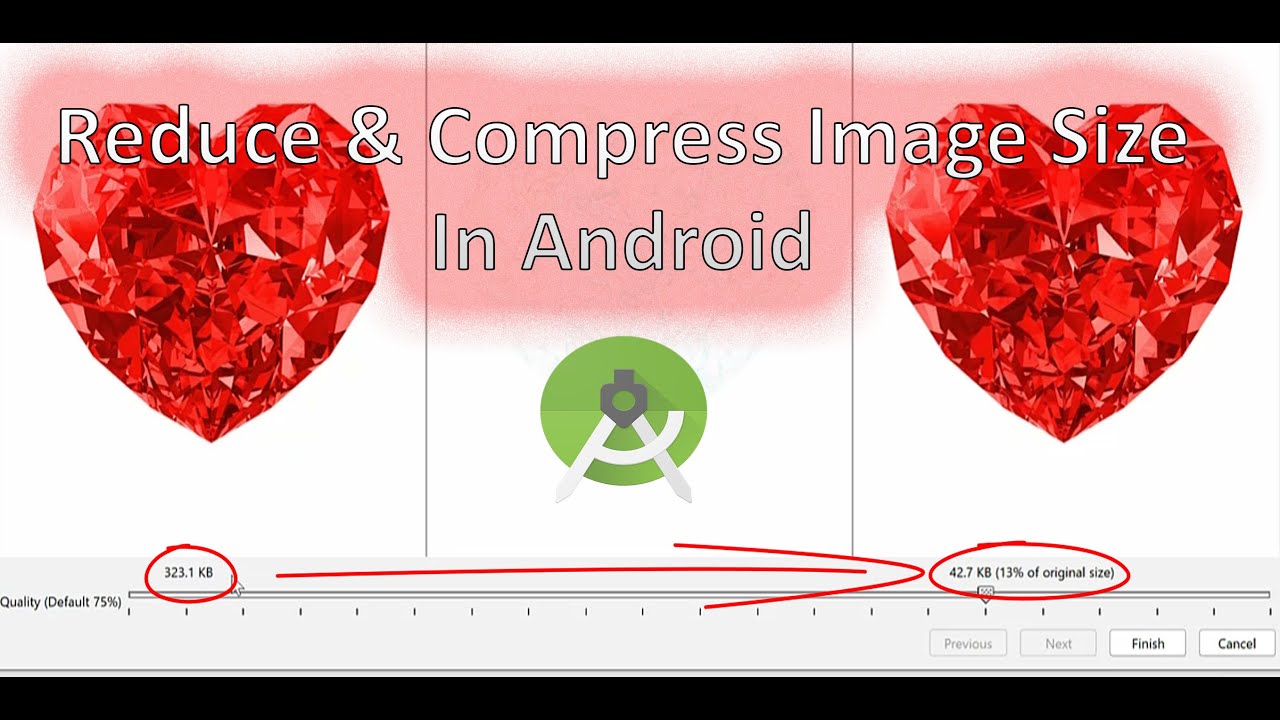
When you select the ‘Converting Image to WebP‘ the following dialog window will appear.
It has a slider, which allows you to change the quality of the image, hence allowing you to reduce the image size.
The smaller the quality, the smaller the image size. But, make sure that you don’t reduce the quality too much.
In my case, I reduced the image to 75%, which reduced the image size by 13% or changed the overall file size from 323 KB to 42.7 KB. Not bad, isn’t it :).
When you finalize this process, Android Studio will show you the total amount of KBs saved from this reduce and compress process in Android Studio.
To make sure that the image size is compressed, you can go and check it in the file explorer and check for the ‘Size on disk’ property. It should show you the new size of the image (in our case it shows 43 KB).
This image reducing and compressing technique is very handy and I suggest using it if you have a lot of images for your Android App. You can drastically compress the overall size of your Android App.
Thanks for watching and reading 😉
![]()