In this tutorial you will learn how to browse SQLite database on Windows 10, using the SQLite DB browser application.
First of all, we search for SQLite DB Browser in the browser and search engine of our choice.
We open the following link and head to the download section to get the installation file:
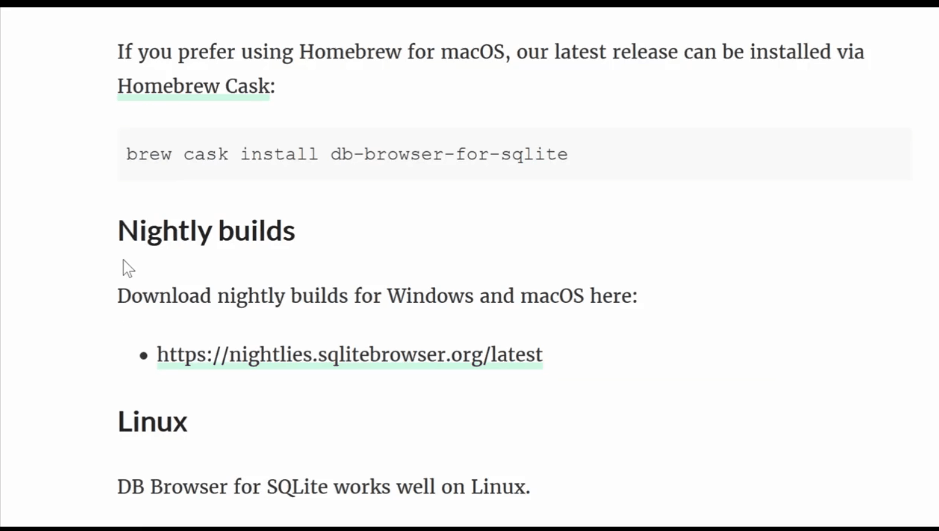
Note: I suggest looking for the “Nightly Builds” and go for “Download nightly builds for Windows and macOS here” file, as that is the link that worked best for me.
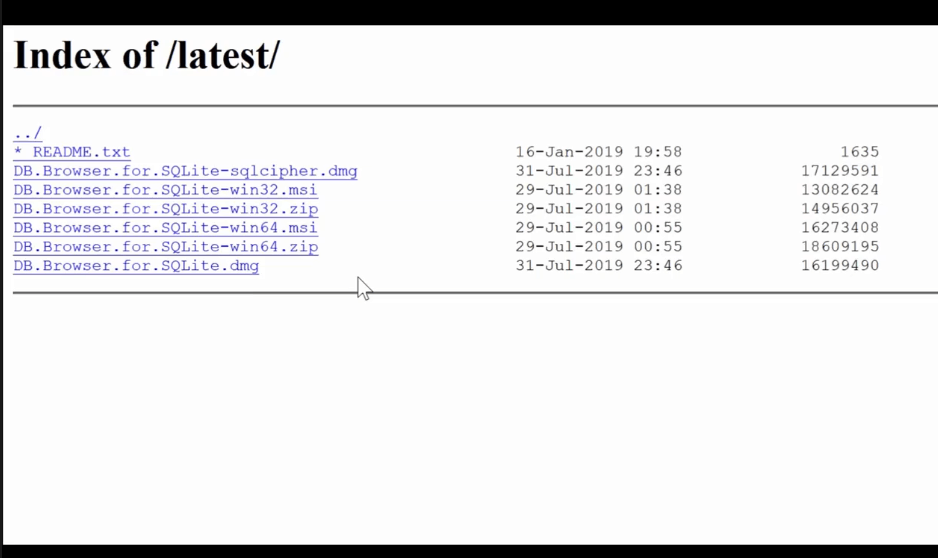
In the next windows, you will have to choose the .msi or the .zip file that corresponds with the type of computer.
I choose the “win64” version, as my computer or processor supports 64 bit architecture. Yours might be different. Makes sure to check that, before installing this file.
After you have downloaded the file, install it on your computer, in my case is a Windows machine.
The installation is straight forward, similar to the most Windows applications.
Android Studio
Then, we move to Android Studio. You will need to have a database with one or more tables in it. You will also need to add some record(s) to the table(s).
Then, go to the View menu in Android Studio, then select the ‘Tools Windows’ list and finally select the ‘Device File Explorer’. A window, will open on the right side of Android Studio.
You can select the Emulator or your real Android device and search for the path where the database is located.
We open the ‘data‘ folder and expand it. In the same folder, search for another ‘data’ folder. Next, you will search for the project folder, which in my case is ‘com.example.sqlitedatabase’.
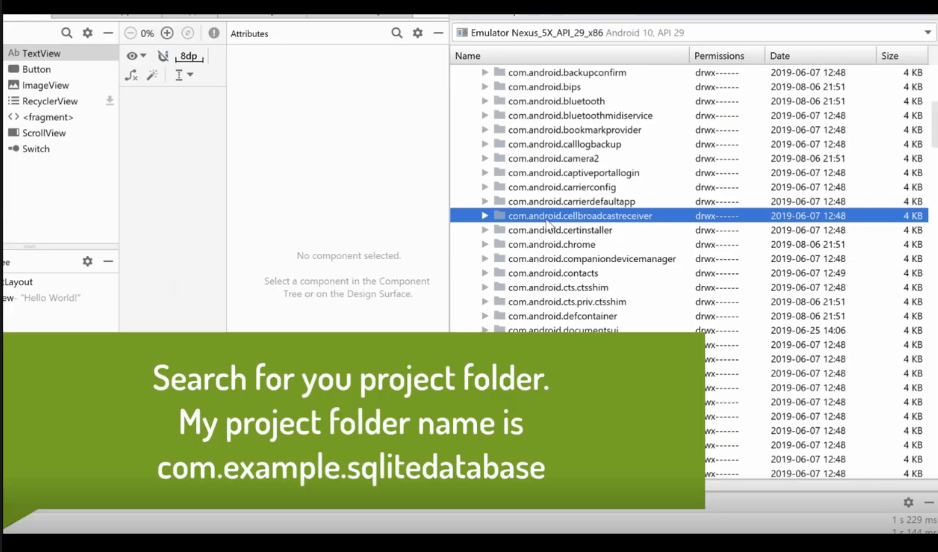
After you find you project folder in Android Studio, expand it and in the databases folder (expand it) and you will see 3 files:
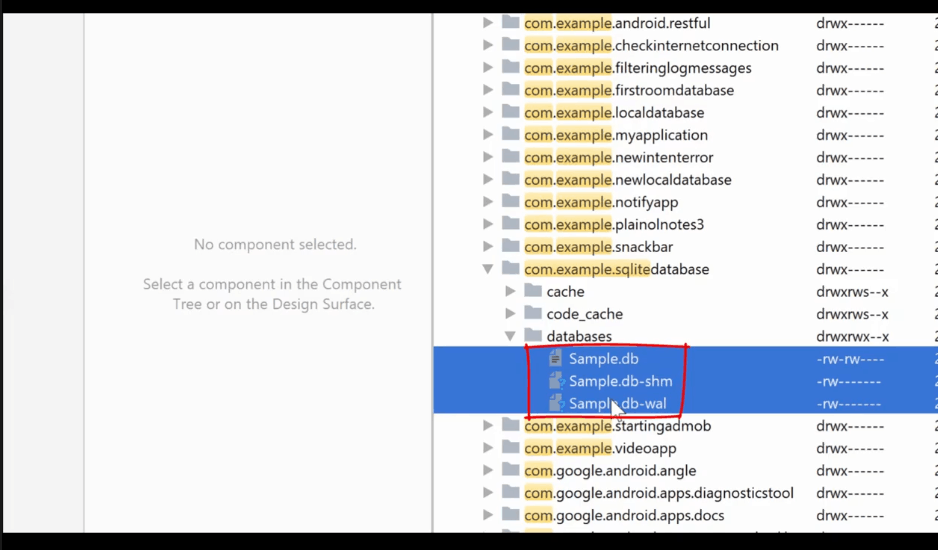
Note: it is important to remember to select all 3 files in the databases folder of your project.
All the 3 selected files, you need to export them. You do that by right clicking and opening the ‘Save as:’ dialog box. Make sure to save them somewhere in your computer. In my case, I save them to my Desktop.
DB Browser for SQLite Application
Next, you open the DB browser for SQLite application that we installed earlier.
Within the application, select ‘Open Database’ and find the folder, where you saved all the 3 database files. You will need to find the .db file and select it.
Go to ‘Browse Data’ tab and from the ‘Table’ drop-down menu, select your table. You should see all the records of the table, populate the window.
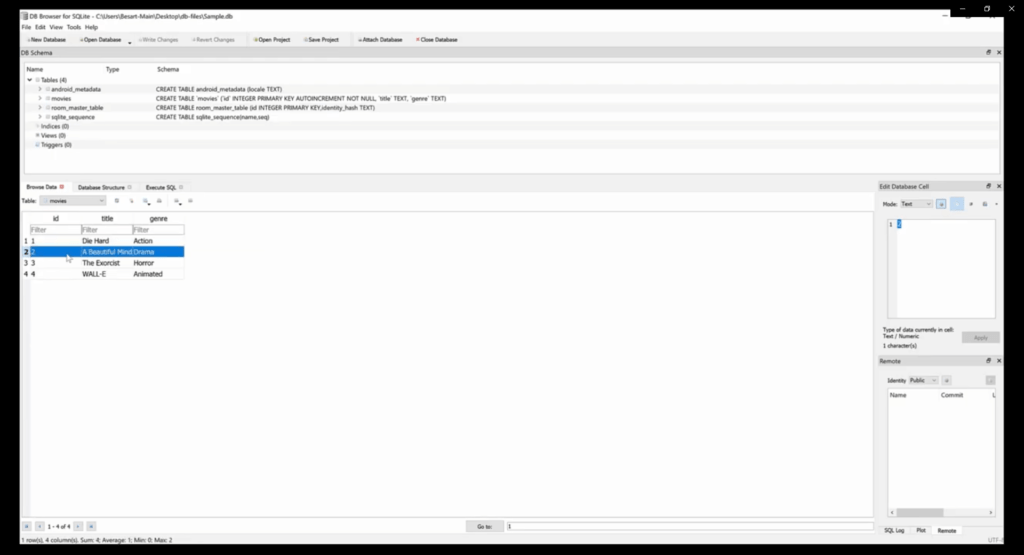
There, you can edit the records in place, save it and return the database to Android Studio and your Android project.
Hopefully this was helpful.
Leave your comments and questions in the section below.
Thanks for watching and reading!
![]()


