In this tutorial you will learn all the steps to build a typewriter effect in DaVinci Resolve. This will all be done using the DaVinci Resolve free video editing software.
We start by building the flashing line png sequence!
After creating the composition and adding it to the timeline, we move to the Fusion tab of DaVinci Resolve.
We will use a white rectangle, which will have its alpha channel lowered to 0 to simulate the fading out effect. The fading in/out effect happens withing one second, which the duration of this clip.
Then we save the fading in/out animation of the rectangle using the saver node in Resolve.
Note: when you render the animation, make sure you export all the frames of it.
After rendering the animation using the saver node, we get a folder with a png sequence of files, that represent this animation and can be reused.
Next, we start building the typewriter effect. First of all we import the sequence we exported in the previous step. You can import the sequence by drag and dropping the whole folder in the Medial Pool section.
We drag the sequence to the Fusion tab and set the mediaIn1 to Loop, as we need this animation to loop continuously.
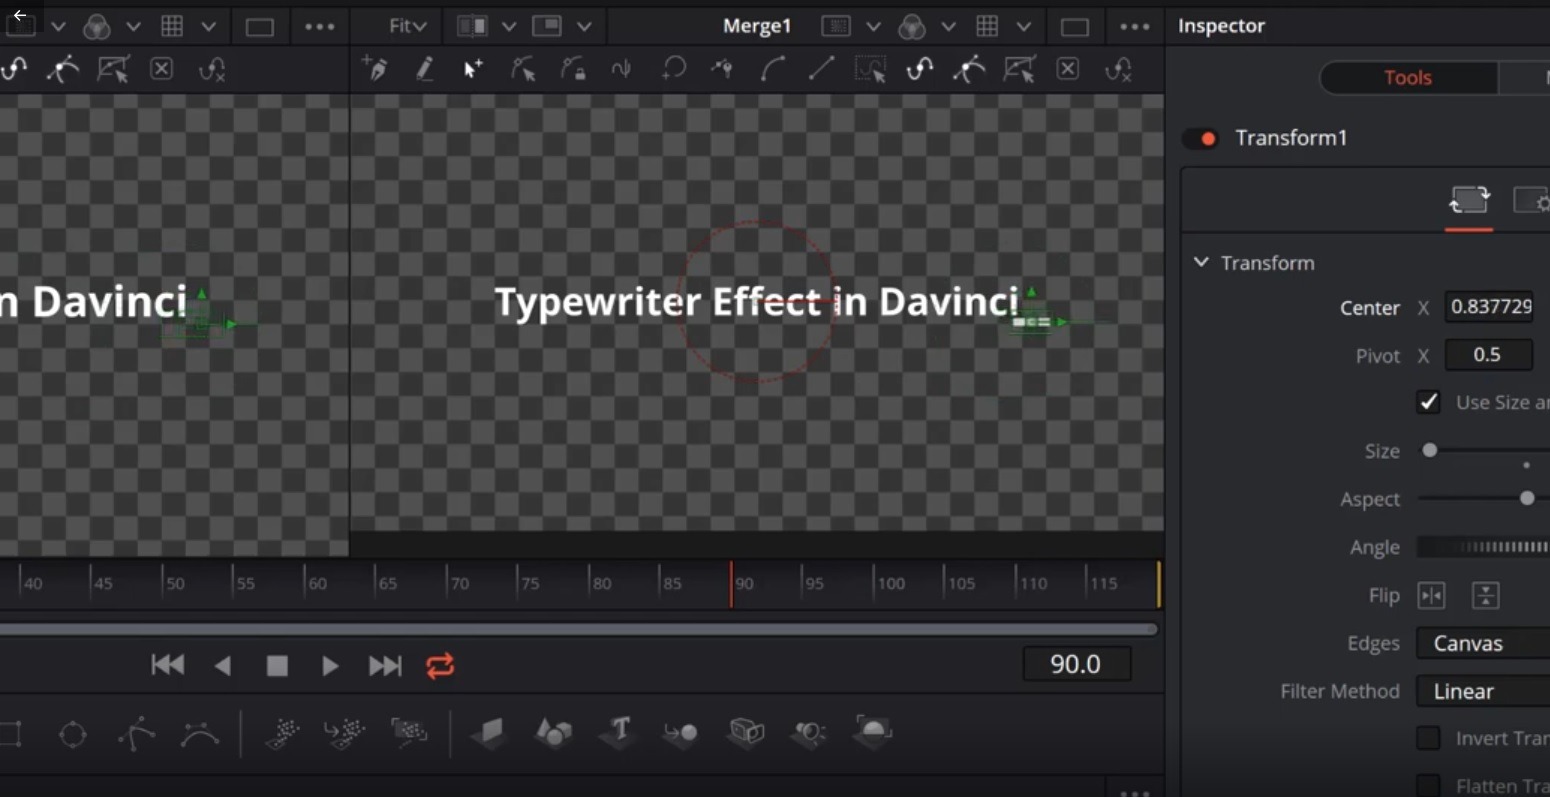
Next we add the text and format it. To achieve the typewriting effect, we utilize the Write On property.
When using the Write On property, one important thing is to extend the waiting time between writing a word, to give it a better typewriter effect. This is done using the Spline editor in the Fusion section.
Next, we have to animate and move the flashing line clip horizontally, so that it follows the write on effect.
And there you have it, a nice typewriter effect using Resolve.
This is not the best way to realize this effect and not the most elegant, but it will do the job.
If you have any question or difficulty, leave it in the comment section below.
Hope you enjoyed it and it was useful to you.
![]()
Related Tutorials:
 Transparent Background Fusion Clip Export in DaVinci Resolve 16
 Subscribe Button Design And Animation in DaVinci Resolve 16. BONUS – Free GREEN SCREEN BUTTON Button Animation
 Creating Fire Comet Text Reveal Effect using Particles in DaVinci Resolve