Table of Contents
Hello, in this tutorial you will learn how to do a looping arrow animation in DaVinci Resolve.
You can use this tutorial to make arrow animations that loop forever and have the arrows point to a section of you video, which needs to attract the attention of the viewer.
At the end of this tutorial, I show how to use the looping arrow animation in DaVinci Resolve.
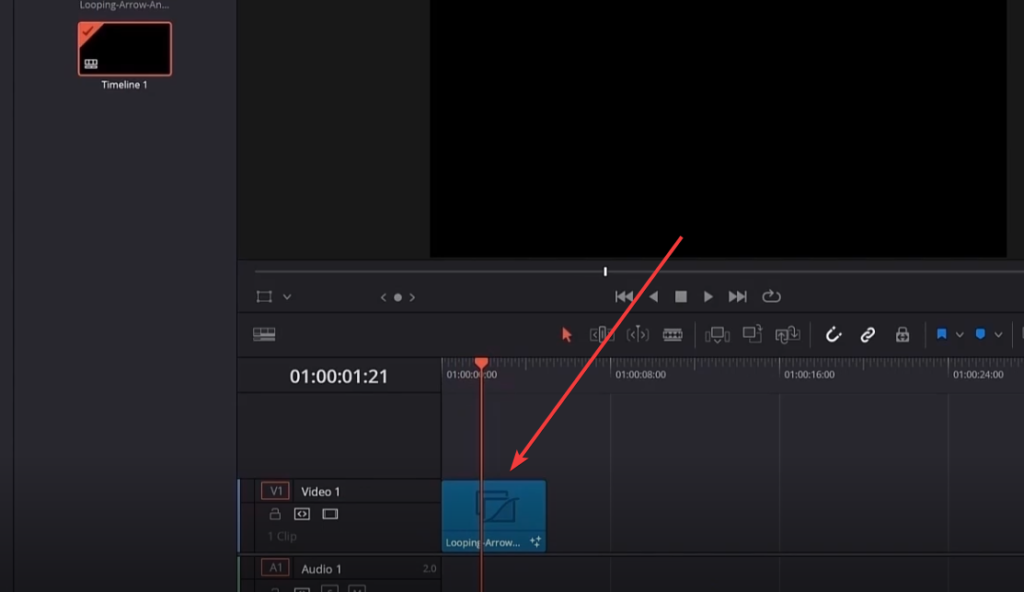
In the edit page I drag a video clip and place it below my fusion composition (which contains the looping arrow animation). The arrow points to an old camera located at the left bottom part of the clip.
Enough words, here is the video:
If you are a kind of person that wants to read the text tutorial, then you can continue reading the tutorial below.
Creating the Looping Arrow Animation
In the Edit page I create a new Fusion Composition and name it to “Looping Arrow Animation”. The fusion composition is 5 seconds long by default, but you change the duration to your needs.
Next, I drag the Fusion Composition to the first video track in the Edit Page of DaVinci Resolve 18.
In the Fusion Tab I use the Shape Components or Tools. You can find the shape Tools by clicking the Effect menu, then Tools and then Shape menu.
In the shape menu you will find the sRectangle, sNGon, sTransfrom and sRender nodes. All of them are required to create the arrow shape.
We use sRectangle to create the tale of the arrow. The tip of the arrow is created using sNGon. For the sNGon we change the sides property from 6 to 3, to create a triangle.
To transfrom and move the whole arrow we use the sTransform node.
Finally, the sRender node is used to render the arrow shape and the looping arrow animation.
Creating the animation
To create the animation we make 3 keyframes, one at frame 0, one at frame 30 and the last one at frame 60.
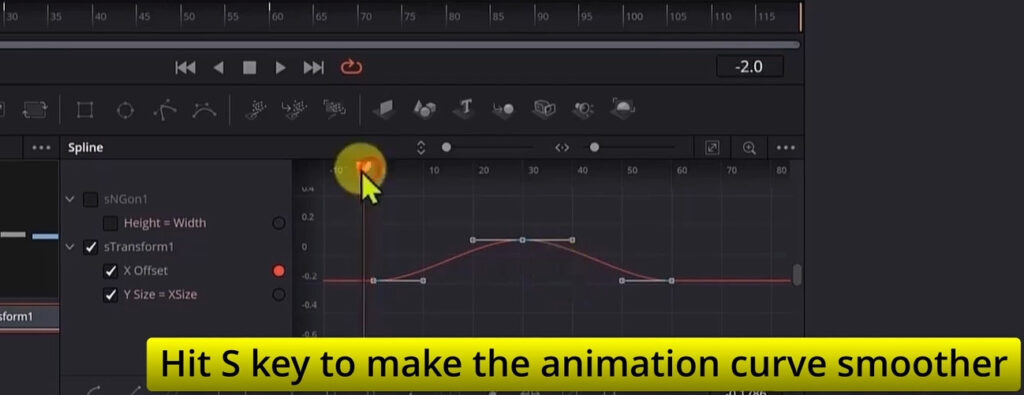
Using the sTransform node we change the X offset, to have the arrow animate horizontally in the X axis.
Then, open the Spline editor and use the “S” key to make the animation curve smoother.
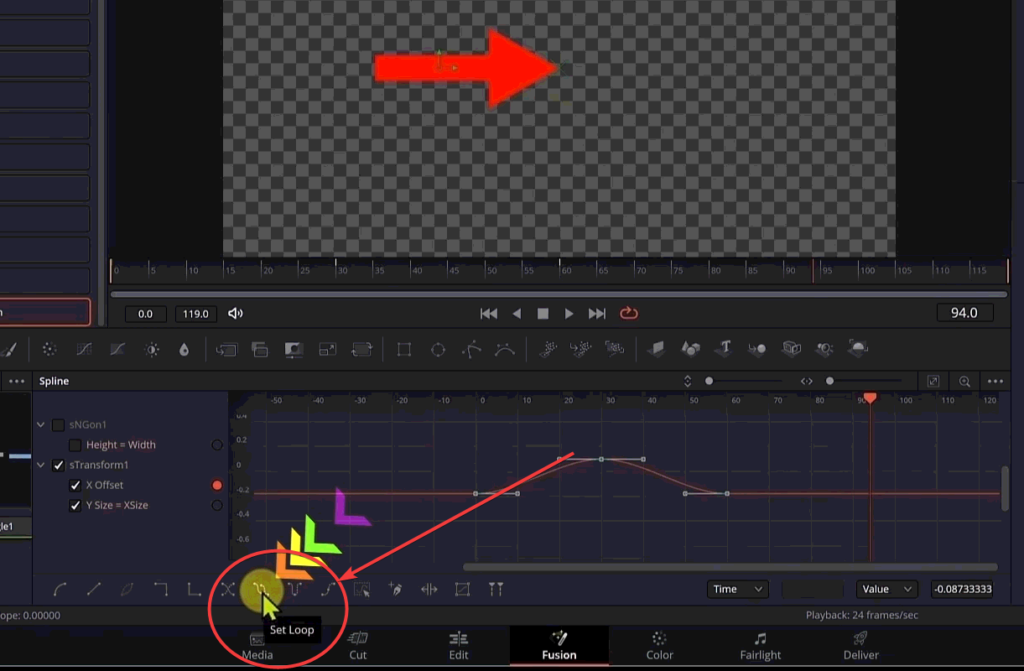
Looping the animation
To loop the arrow animation we use the Spline Editor. Once all the keyframes are selected, hit the “Set Loop” button, and the animation will be repeated infinitely through the whole duration of the clip.
Will the animation continue if I increase the duration of the Fusion Composition?
Yes, since we are using the “Set Loop” option in the Spline Editor, the arrow animation will loop forever, meaning that, no matter how much you increase the duration of the Fusion Composition, it will still continue playing, through the end of the Fusion Composition.
Conclusion
Learning how to make a Looping Arrow Animation has been very helpful to me, as I use arrows in my tutorials to focus the viewer’s attention to a specific part of my video tutorial, so that they more easily follow the flow of the actions in the tutorial.
Did you find it useful? What are the ways you are going to use this arrow animation in your next projects? Let me know in the comments.
And this concludes this tutorial, hopefully it was useful to you.
Thanks for reading the tutorial.
![]()