Table of Contents
Hi, in this tutorial I will show you a very easy way to highlight area in DaVinci Resolve 17.
In this tutorial, I will be using this video clip, which you can take here: https://pixabay.com/videos/dashboard-data-graphs-diagrams-10847/
HIGHLIGHT AREA in DaVinci Resolve – YouTube Video Tutorial
If it is easier for you, then here you have my YouTube Video Tutorial, which you can watch
Lets continue with the article
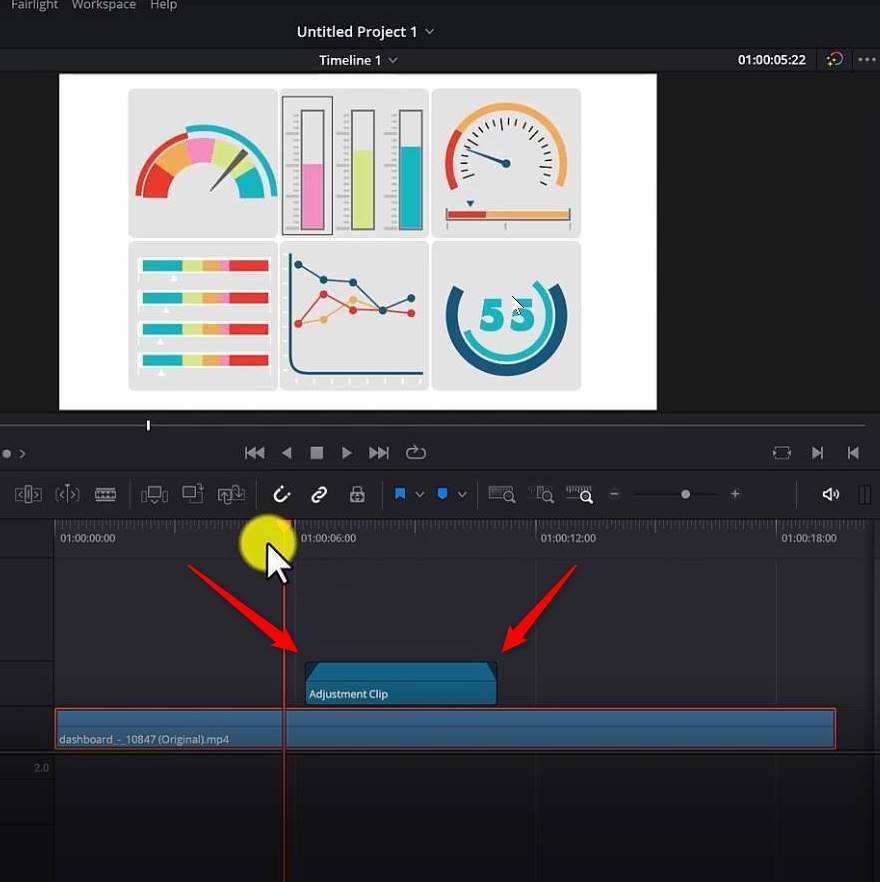
First thing you need to do is add an adjustment clip.
If you go to Effects -> hit Toolbox and then search for Adjustment Clip.
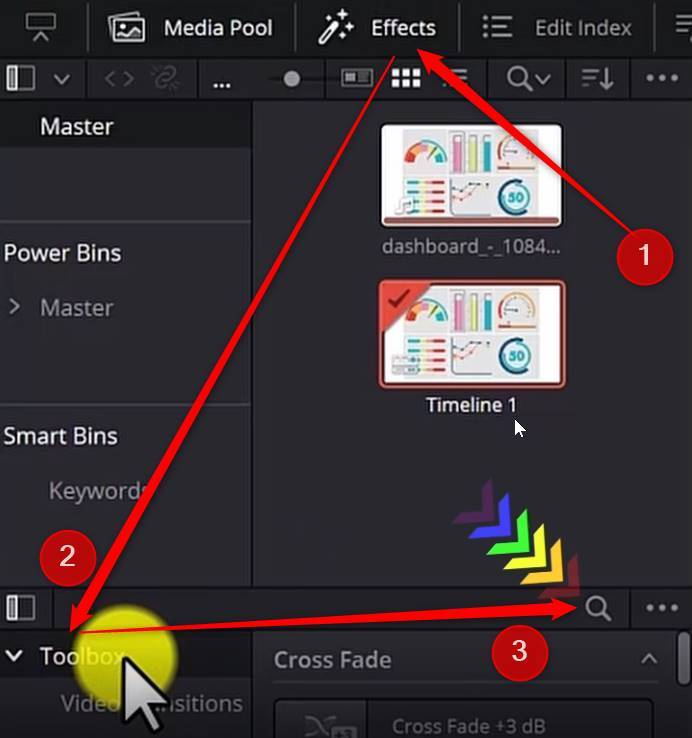
Drag and drop it above the clip. The highlighted area will be visible to the duration of the adjustment clip, so make sure to increase it or decrease the duration to your needs.
You change the duration of the adjustment clip by click hold and dragging left or right either of the edges of the adjustment clip.
Color Tab
Next, go to the color tab by clicking the Color Tab icon in DaVinci Resolve.
In the color tab, if the clips area is not visible make sure to enable it.
Also, make sure that you are working in the adjustment clip.
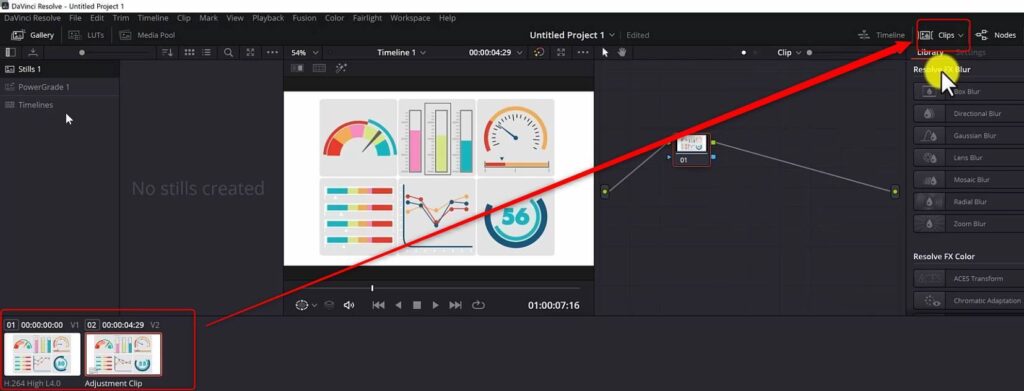
Next, you need to click this Window icon and there you will have different types of tools to choose from … linear, circle, polygon.
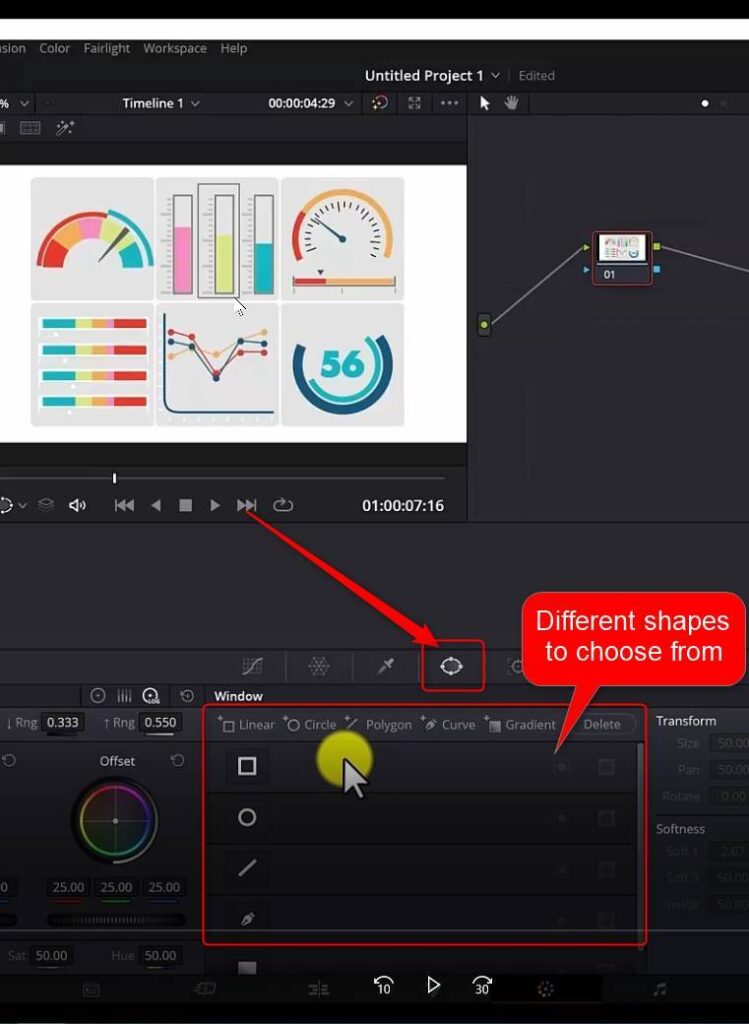
I will choose this rectangle and click in the adjustment clip.
By clicking the edges, you can resize the rectangle to your needs.
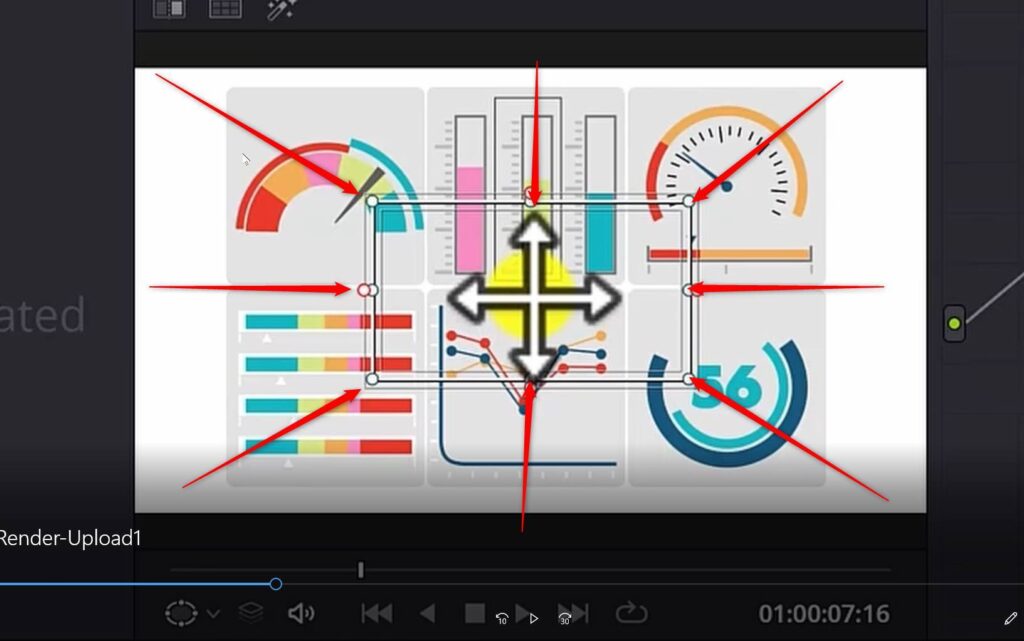
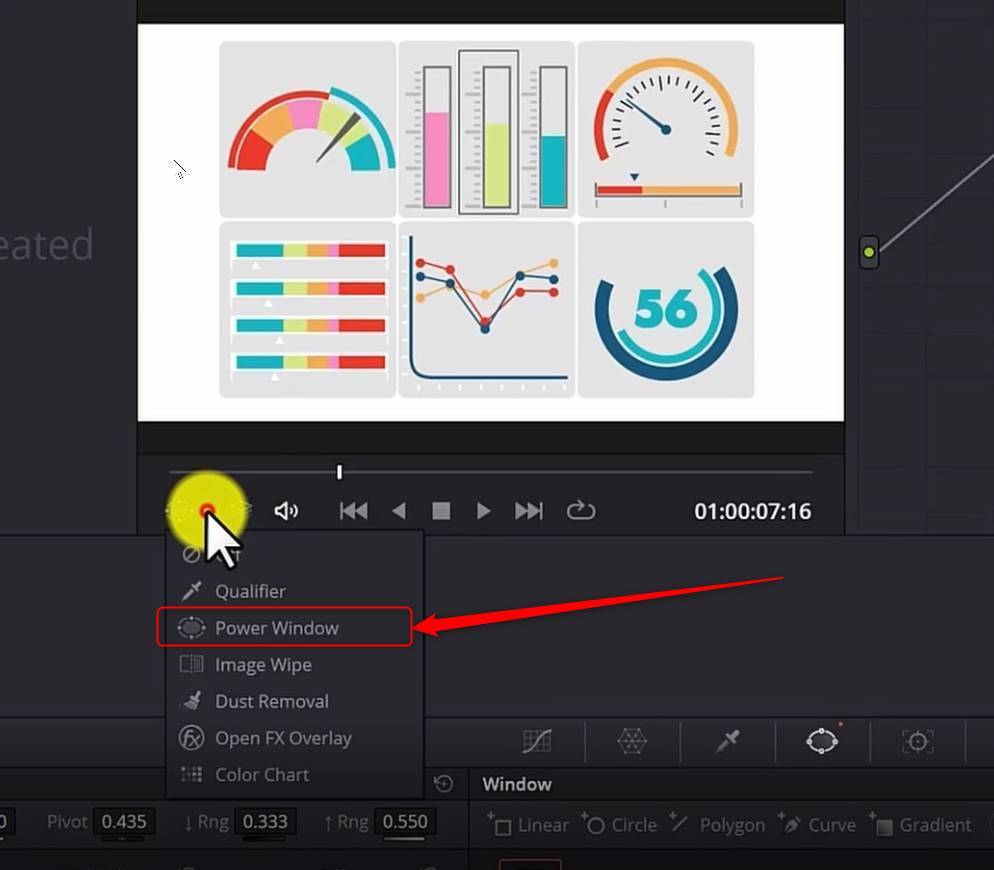
If you power window is not activated you will not be able to see the rectangle, so make sure it is activated.
You do it from this drop down menu and click Power Window.
Now, there are multiple ways to make the area around darker. I use the Offset Control. Move the values to the left to start getting the darkened area.
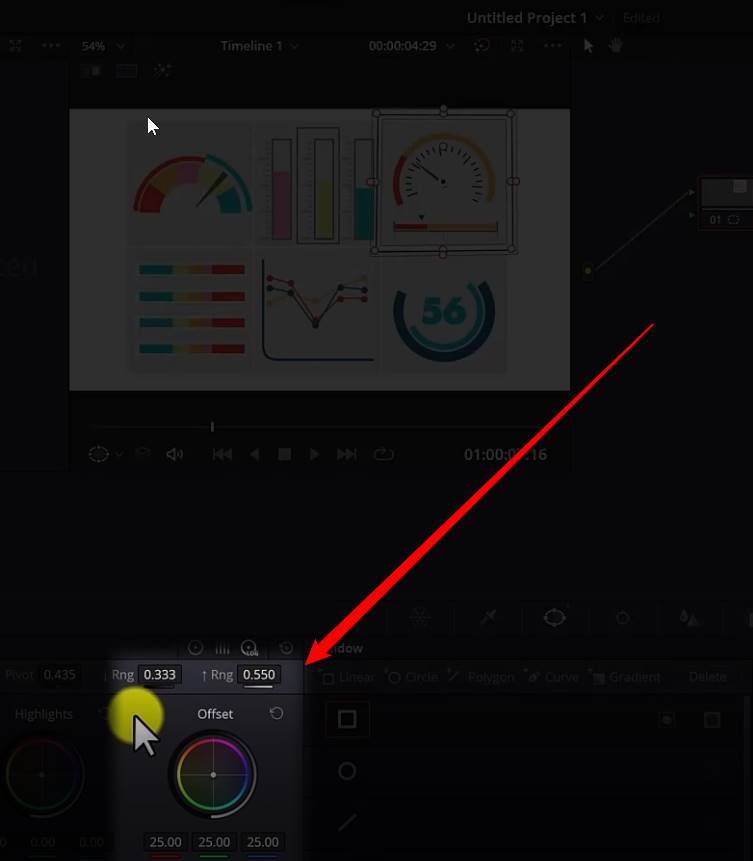
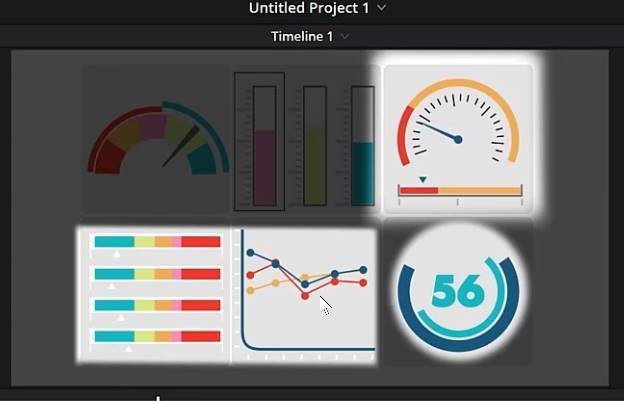
To darken the outside are of the rectangle, hit the Invert button. Now the area to be highlighted is white and everything around is darkened.
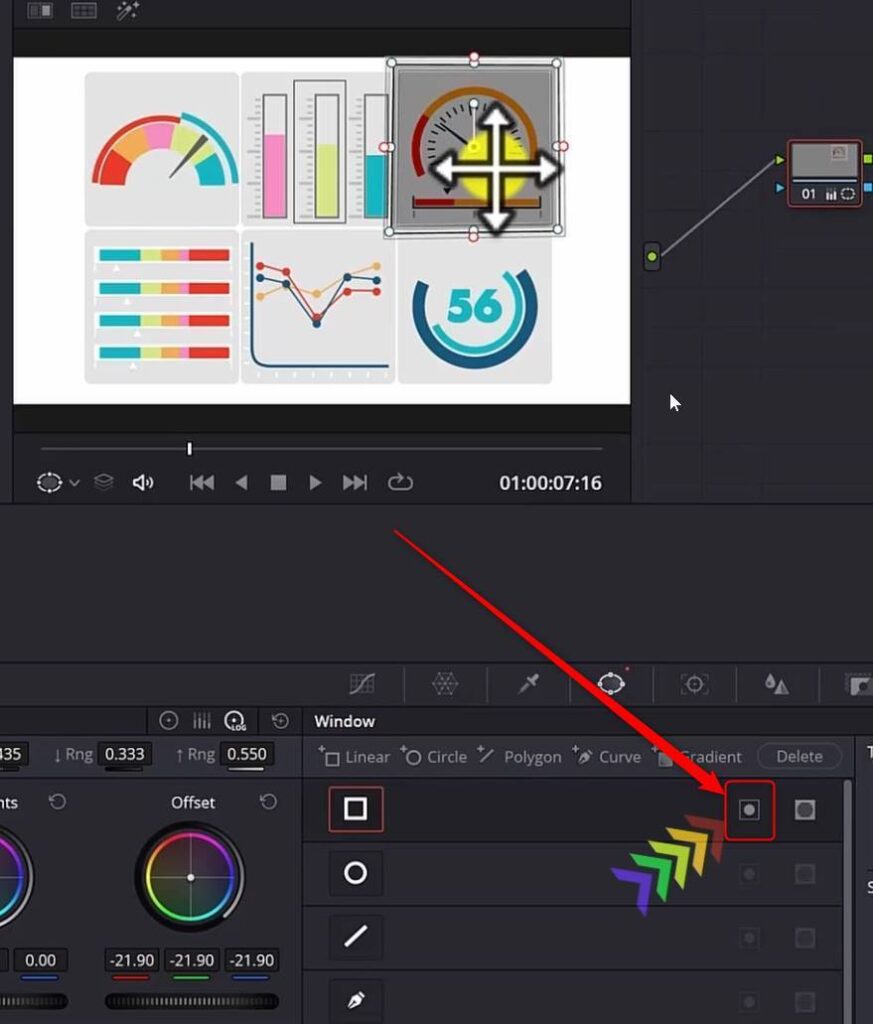
Depending on how dark the surrounding area needs to be, you can define it with the offset control or you can go to the Curves Control and lower the right edge point or lower the highlights.
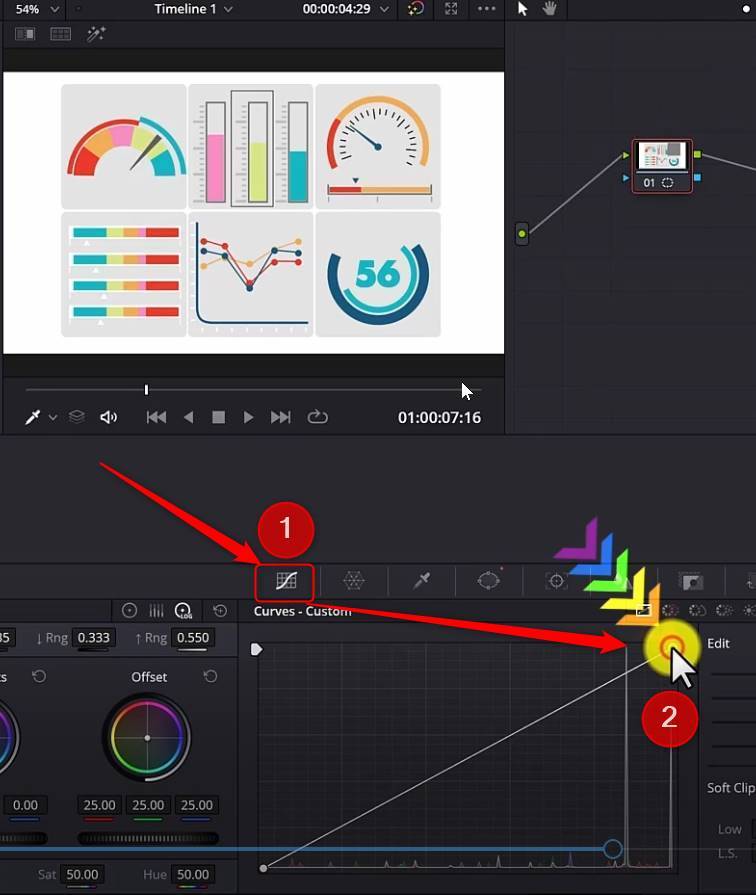
Adding additional highlight areas
If you want to add additional highlight areas to the same clip, you go back to the window panel.
In this area select a shape by hitting one of the shapes. I will select the circle.
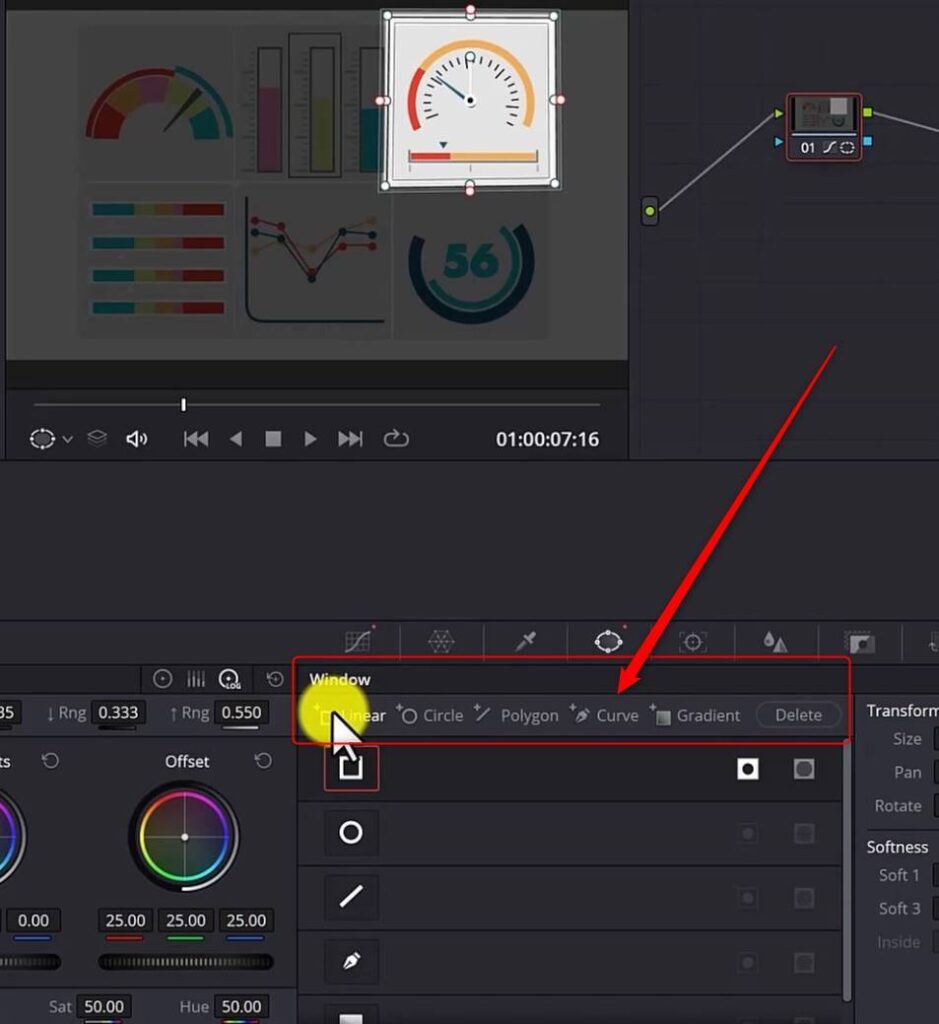
To apply the highlight effect to that area as well, we click this mask button as in the picture. Now we have two highlighted areas, but you can add as much as you want.
Soften shape edges
To soften the edges, you can use these Red Circles and move them accordingly, or go to the Softness Panel and increase or decrease the values.
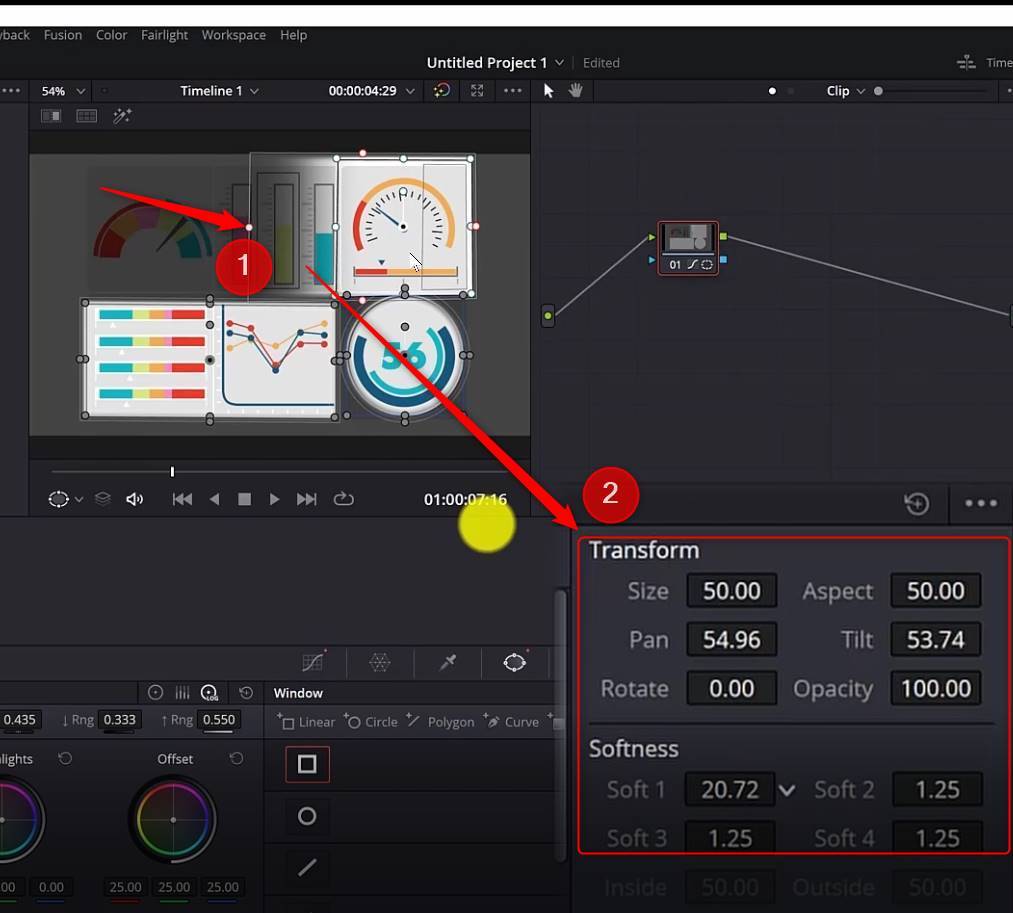
Lastly, if you go to the Edit page of DaVinci Resolve, you can add transition to the adjustment clip by dragging the edges of the adjustment clip, which will add fade in and fade out transition effect.
Below is the picture shows the final result of highlight area in DaVinci Resolve.
Conclusion
By highlighting area in your video or images, you emphasize part of the clip to draw the attention of the viewer to a selected area.
So, by using the highlight area in DaVinci Resolve technique you can achieve an easy highlight effect, which you can use in your video tutorials.
Here you have it, thanks for reading this tutorial. See you in other tutorials.
More DaVinci Resolve Tutorials for Beginners
The above tutorial is mostly meant to be easy to follow and expected group is DaVinci Resolve Beginners.
If you are a DaVinci Resolve Beginner or beginner in video editing in general, I have a full list of DaVinci Resolve Tutorials for Beginners.
Find them in this playlist: https://youtube.com/playlist?list=PLrVlNmJhrkfp3wwAMkVTYLG_e8TRvvaM9
![]()

