Table of Contents
This tutorial shows you 3 ways to export still image out of DaVinci Resolve 17.
You can use this method to export still image out of any animation in DaVinci Resolve.
These methods of exporting still image or frames are very useful. You can use it for example to export an image out of your animation and use it to design your YouTube video thumbnail.
The full video tutorial is shown as follows:
Export still image – Method 1:
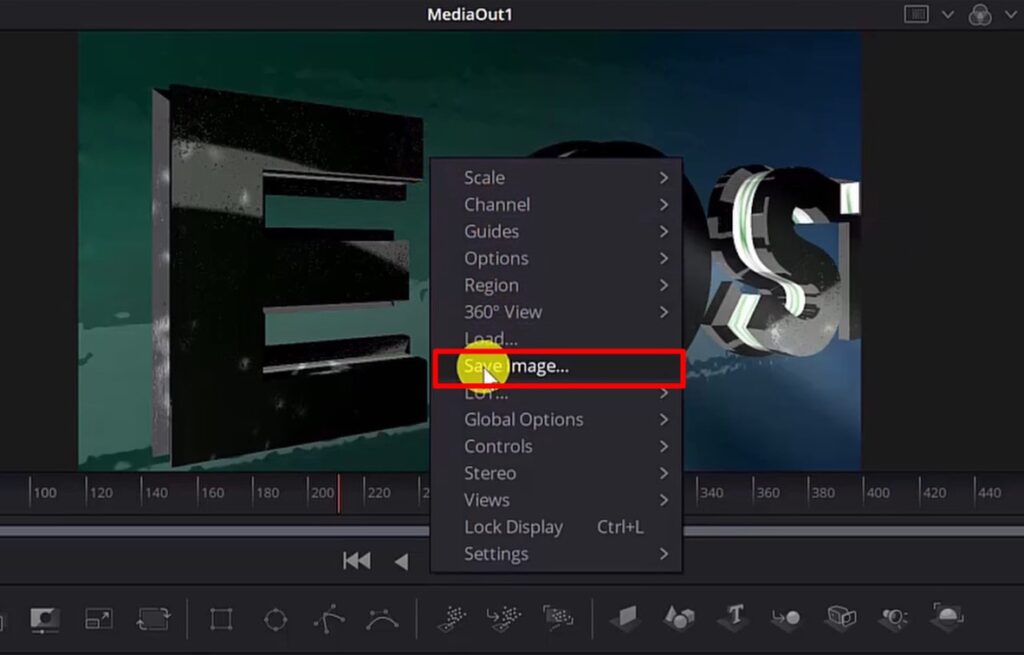
The 1st way to export still is done from the fusion tab, by selecting the frame you want to export as a still or export as an image.
Once, you decide which frame to export, you right click on the main viewer or screen in the fusion tab. In the drop-down menu you click the “Save Image” button.
After clicking it, a dialog box will be shown, to allow you to name your image and select the location where to save the file.
Choose the location and name your file and you are done, you have your image exported and ready for use.
Method 2:
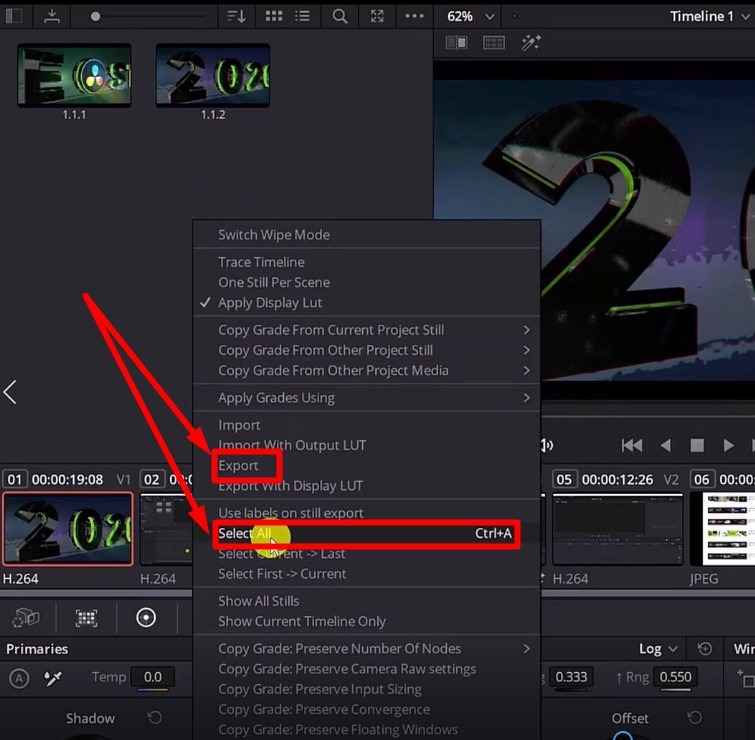
The second method to export still image, is done from the color tab.
From the main viewer in the color tab, you right click and select “Grab Still” from the drop-down menu.
If the “Gallery” panel is now shown, you must hit the “Gallery” button and it will show up.
In the “Gallery” panel, you can see all of the grabbed stills.
From this panel, you can export one or multiple stills as image.
- If you want to export only one still, you select only one still, and then from the drop-down menu, after right clicking, you choose “Export”
- If you want to export multiple stills as images, you right click and hit “Select All” from the drop-down menu (or use Ctrl+A). Then, again right click and select “Export” from the drop-down menu
Here also, you need to choose the location where to save the exported images.
Method 3:
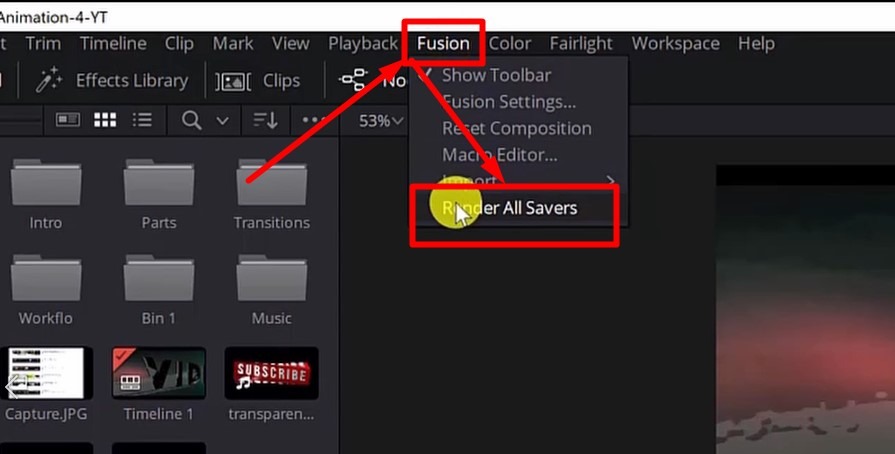
The third way is performed from the fusion tab using the saver node.
This method allows exporting a very big number of images (each image represents a frame from your DaVinci Resolve animation or composition).
To render the saver node, you select “Render All Savers” from the “Fusion” drop-down menu of DaVinci Resolve 17.
After the “Render All Savers” button is hit, you might have to wait for a while until all of the still images are generated, depending on the length of your DaVinci Resolve clip or animation.
Conclusion
Knowing how to grab and export still image out of DaVinci Resolve 17 is very useful technique and I have used it many times so far.
Very often, I make complex 3D animations or tutorial and I want to grab a frame and based on that to design my Youtube video thumbnail.
I usually export still image out of DaVinci Resolve 17 and then finalize my Youtube thumbnail in Adobe Photoshop. These methods help me design very beautiful Youtube thumbnails, but can be used for other graphic design needs as well.
Very happy if you have reached the ending of this article. Hope it was useful and thanks for reading this article.
But wait, if you want to learn more tips and trick DaVinci Resolve, you can also check this interesting DaVinci Resolve article: All about Mark IN and OUT Points in DaVinci Resolve
![]()