Table of Contents
In this tutorial you will start your first PHP project. I always use PHP in Visual Studio Code, so it is best if you use Visual Studio Code, as your coding editor.
Preparing to Start
First, we need to find the “htdocs” folder in the XAMPP installation (we use XAMPP, as our PHP environment).
Usually, if you have installed XAMPP by its default settings, you will find “htdocs” folder in the following path:
C:\xampp\htdocs
Again, your’s might be in a different location.
Once, you find the htdocs folder, you will need to create a new folder there.
So, Right Click -> New -> Folder, and name your new folder.
I have named mine: “PHPinVisualStudioCode”.
With the project folder created, we now open our code editor, which is (you’ve guessed it 🙂 Visual Studio Code.
PHP in Visual Studio Code
First, we need to locate our project folder and open it in Visual Studio Code.
We do that by following these steps: File -> Open Folder -> [Find the folder we created in the htdocs folder].
Now, the folder is linked and we can access it from Visual Studio Code.
Creating e new PHP file
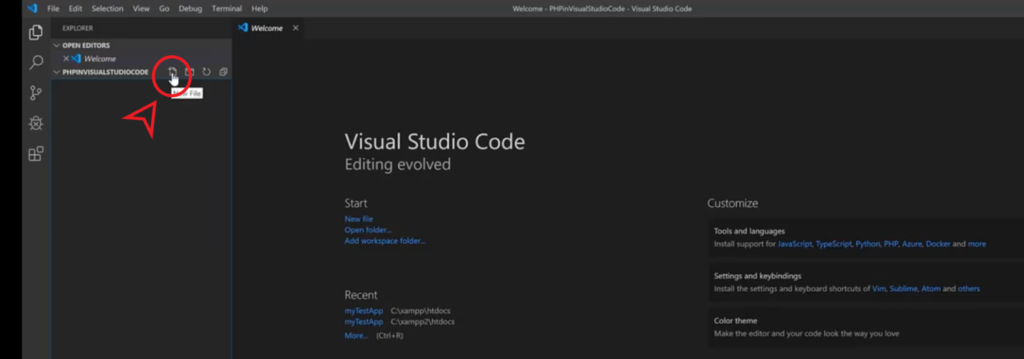
To create a new file, Right Click in the “Explorer” section of Visual Studio Code (inside the folder) and hit “New File”. Or, you can click the new file icon:
I will name my file “index.php”. You can name it as you wish, but make sure you save it with the “.php” extension.
This is a must follow procedure, otherwise your PHP file will not be executed by the Apache Server.
The “.php” extension lets the Apache server know that this file has PHP code in it, that needs to be executed.
Next, we open the file and we are ready to start coding.
Your First PHP Project
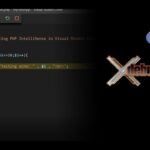
In the opened file, we first open the PHP tags, by typing:
<?php
Next, we call the “phpinfo()” function and don’t forget to add a semicolon (;), to end the line.
Lastly, we close the PHP tag by typing:
?>
And here is the final code:
<?php phpinfo(); ?>
Running your first PHP Project
To be able to run your first PHP project, created in Visual Studio Code, you need to have the Apache Server up and running.
It can run locally (using XAMPP) or in your hosting environment.
In XAMPP, to make sure the Apache server is running, make sure that the “Start” button is clicked in the “Actions” column in the XAMP Control Panel and the “Apache” word has a green background.
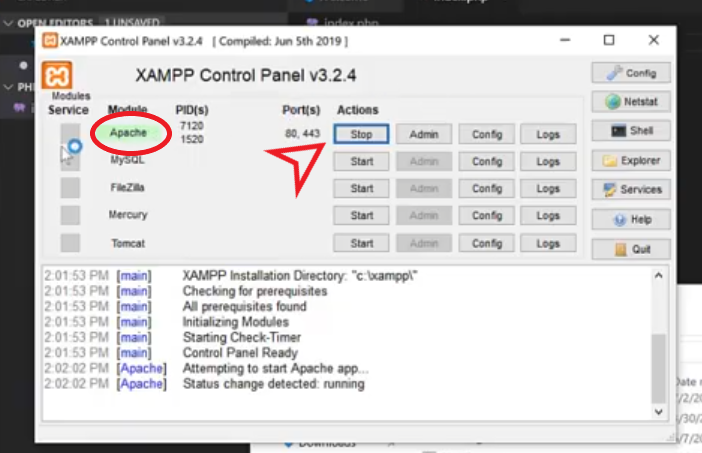
You can activate the XAMPP control panel from the XAMPP installation folder. Find the “xamp-control” application icon and double click it.
In my XAMPP installation the XAMPP control panel is located at this path:
C:\xampp\
View your first PHP Project in Browser
With Apache server running, open your desired web browser.
In the url box, type the location to your PHP project and your PHP file and hit “Enter”.
I saved mine in this path:
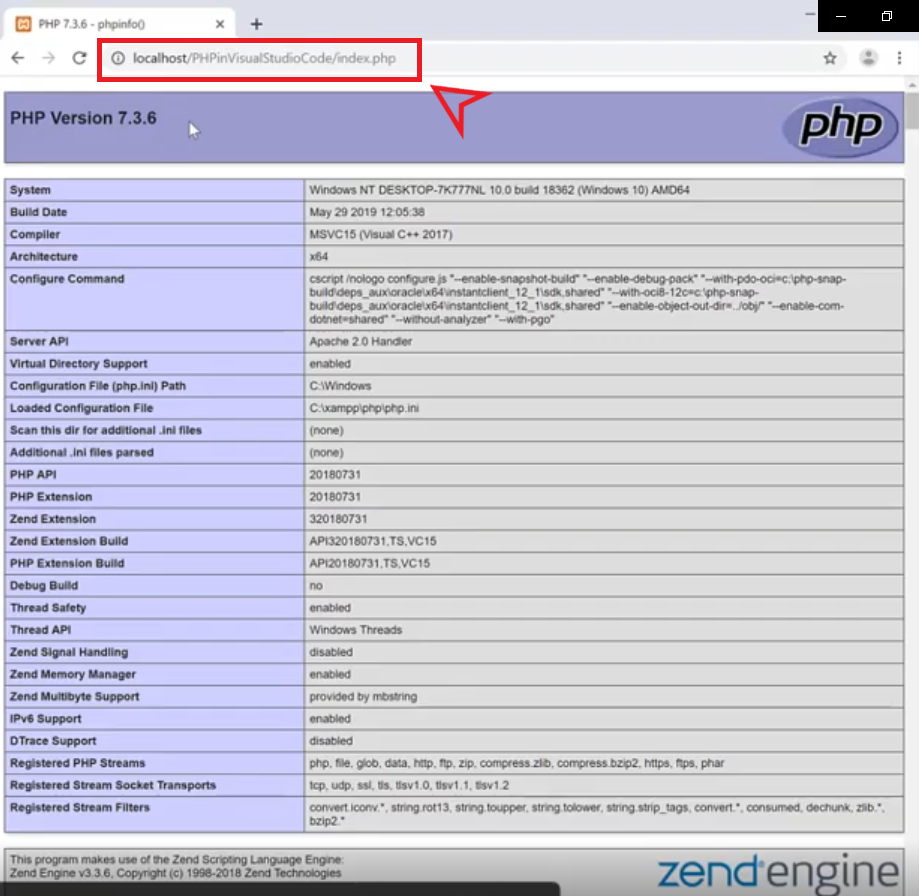
http://localhost/PHPinVisualStudioCode/index.php
The “localhost” part, shows you that you are running the Apache server locally.
The part “PHPinVisualStudioCode” is the folder name.
The part “index.php”, is the PHP filename.
Running this PHP file, will show you the PHP installation information (that is what the phpinfo() function does).
If you don’t see a screen like the one below, then something went wrong. You should check your Apache server or your PHP code.
Another Example
You can go back to your “index.php” file and type this code:
<?php
  echo "Hello there!";
?>
The code above, will print the line “Hello there!” in your browser!
Conclusion
And here you go, congratulations, you just made your first PHP project in Visual Studio Code.
Your PHP exciting journey has just begun.
I hope that this will be useful to you and one day you become an excellent PHP programmer.
Thanks for watching and reading!
Take care 😉
![]()